WooCommerce provides a robust framework for managing orders. However, sometimes the default order statuses might not fully align with your business processes. In such cases, adding custom statuses can be incredibly useful. Whether you want to distinguish between different stages of fulfillment or have unique statuses for specific types of orders, WooCommerce allows you to tailor the order management system to fit your needs.
1. Register custom post status
WooCommerce simplifies the process of registering a custom order status through the woocommerce_register_shop_order_post_statuses filter.
function you_bou_register_order_post_status( $order_statuses ) {

	$order_statuses['wc-my-custom-status'] = array(
		// The label for our new status
		'label'                     => _x( 'My custom status', 'Order status', 'youbou_textdomain' ),
		// Whether the status should be publicly queryable
		'public'                    => false,
		// Whether to exclude posts with this status from search results
		'exclude_from_search'       => false,
		// Whether to show in the admin all list
		'show_in_admin_all_list'    => true,
		// Whether to show in the admin status list
		'show_in_admin_status_list'	=> true,
		// Label count for display
		/* translators: %s: number of orders */
		'label_count'               => _n_noop( 'My custom status <span class="count">(%s)</span>', 'My custom status <span class="count">(%s)</span>', 'youbou_textdomain' ),
	);

	return $order_statuses;
}
add_filter( 'woocommerce_register_shop_order_post_statuses', 'you_bou_register_order_post_status' );
2. Display the custom post status
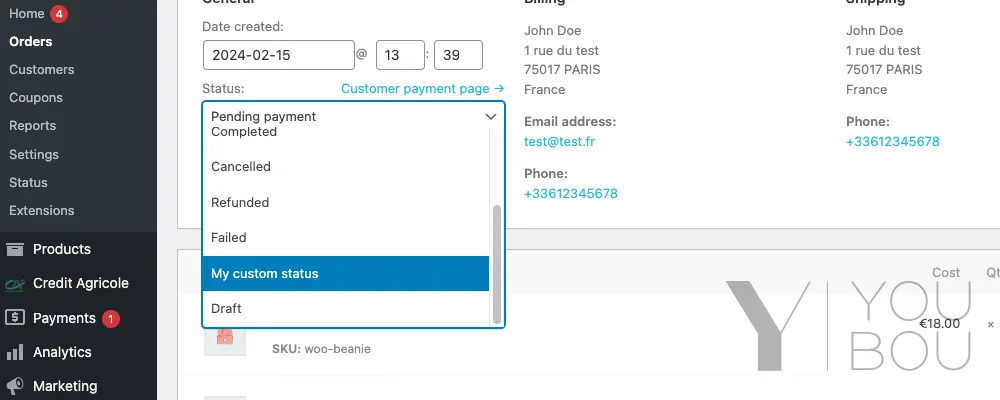
It’s crucial to guarantee the visibility of our custom status in the dropdown menu within the WooCommerce order admin panel. This can be achieved by leveraging the wc_order_statuses filter.
function you_bou_register_order_status( $order_statuses ) {

	$order_statuses['wc-my-custom-status'] = _x( 'My custom status', 'Order status', 'youbou_textdomain' );

	return $order_statuses;
}
add_filter( 'wc_order_statuses', 'you_bou_register_order_status' );
Note: It’s important to note that the ID of the custom status (e.g., wc-my-custom-status) should be limited to fewer than 20 characters. Exceeding this limit might result in the status appearing in the dropdown panel but being unable to change the order status to your custom one. Therefore, it’s advisable to conduct thorough testing by manually attempting to change the status of an order to your custom one, ensuring smooth functionality.
3. Change the status dynamically
To dynamically change the order status from code, you have two options. The first method involves using the following function:
$order->update_status( 'my-custom-status' );Note the absence of ‘wc-‘ in the status ID. This function directly updates the status to your custom one.
The second method utilizes the following functions:
$order->set_status( 'my-custom-status' );
$order->save();
Here, after setting the status using set_status(), you must call save() to finalize the update. This method is preferred if you also need to add or update order metadata. It’s worth noting that update_status() internally combines set_status() and save() methods. However, using save() only once is advisable as it’s a relatively resource-intensive operation.